Database
A database is a collection of information organized so that they can be easily accessed, updated and deleted. Data is organized into rows, columns and tables, and it is indexed to make it faster to find relevant information. Data gets updated, expanded and deleted as new information are added.
Supported databases
Creo supports connection to relational databases such as SQLite, MySQL and PostgreSQL and provides specific tools to easily create and test queries.
The common companion of an application is usually a SQLite database to benefit from locally stored data that does not require a connection to an external resource like a MySQL or Postgres servers.
Database connections
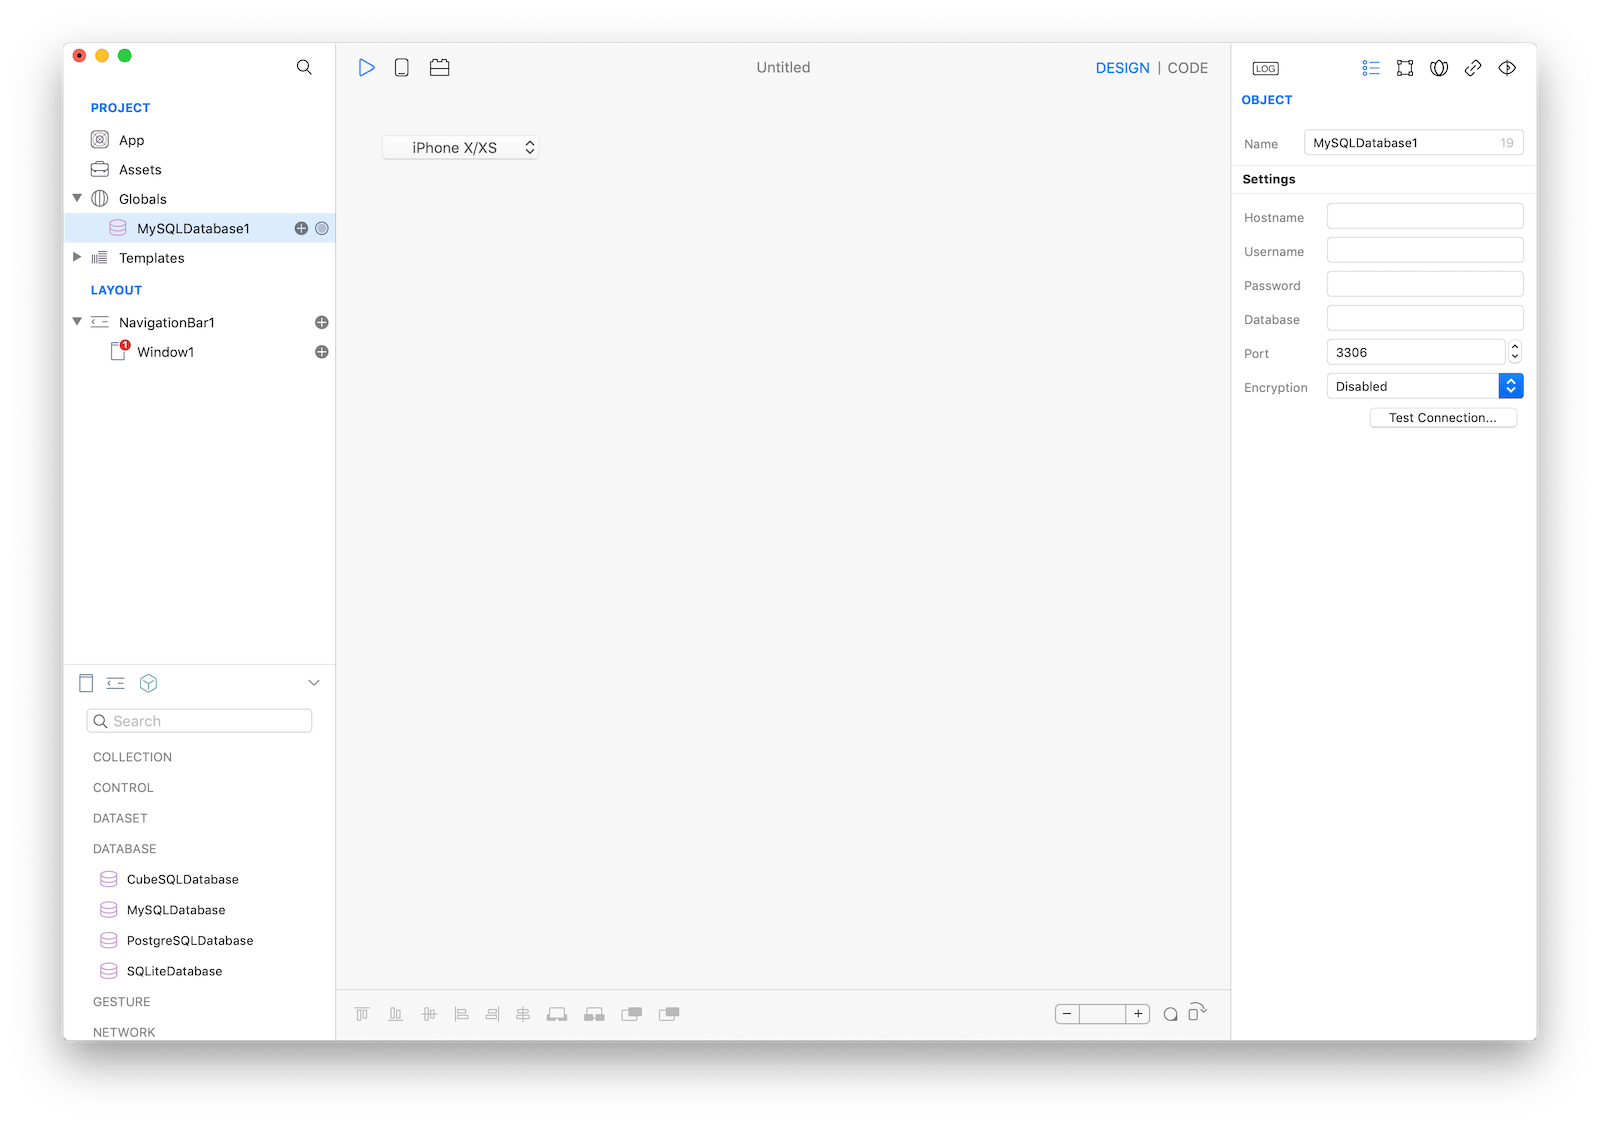
A new database connection is created dragging a database Object from the bottom left Objects view to Project -> Globals. Then using the Inspector is possible to configure the database specific properties and Test the connection.
SQLite extra properties
SQLite databases are files distributed with the application, they may be associated with an Assets file and can be configured to be:
- read-only (default option), the DB is opened from the application bundle and cannot be modified.
- persistent on a file, the original provided DB is copied once to a writeable folder and then opened.
- in-memory, the DB is lost when the application quits.
When it comes to SQLite databases Creo provides an extra tool to create tables and rows.
Tap DB Configurator from the database Inspector panel to open the tool.
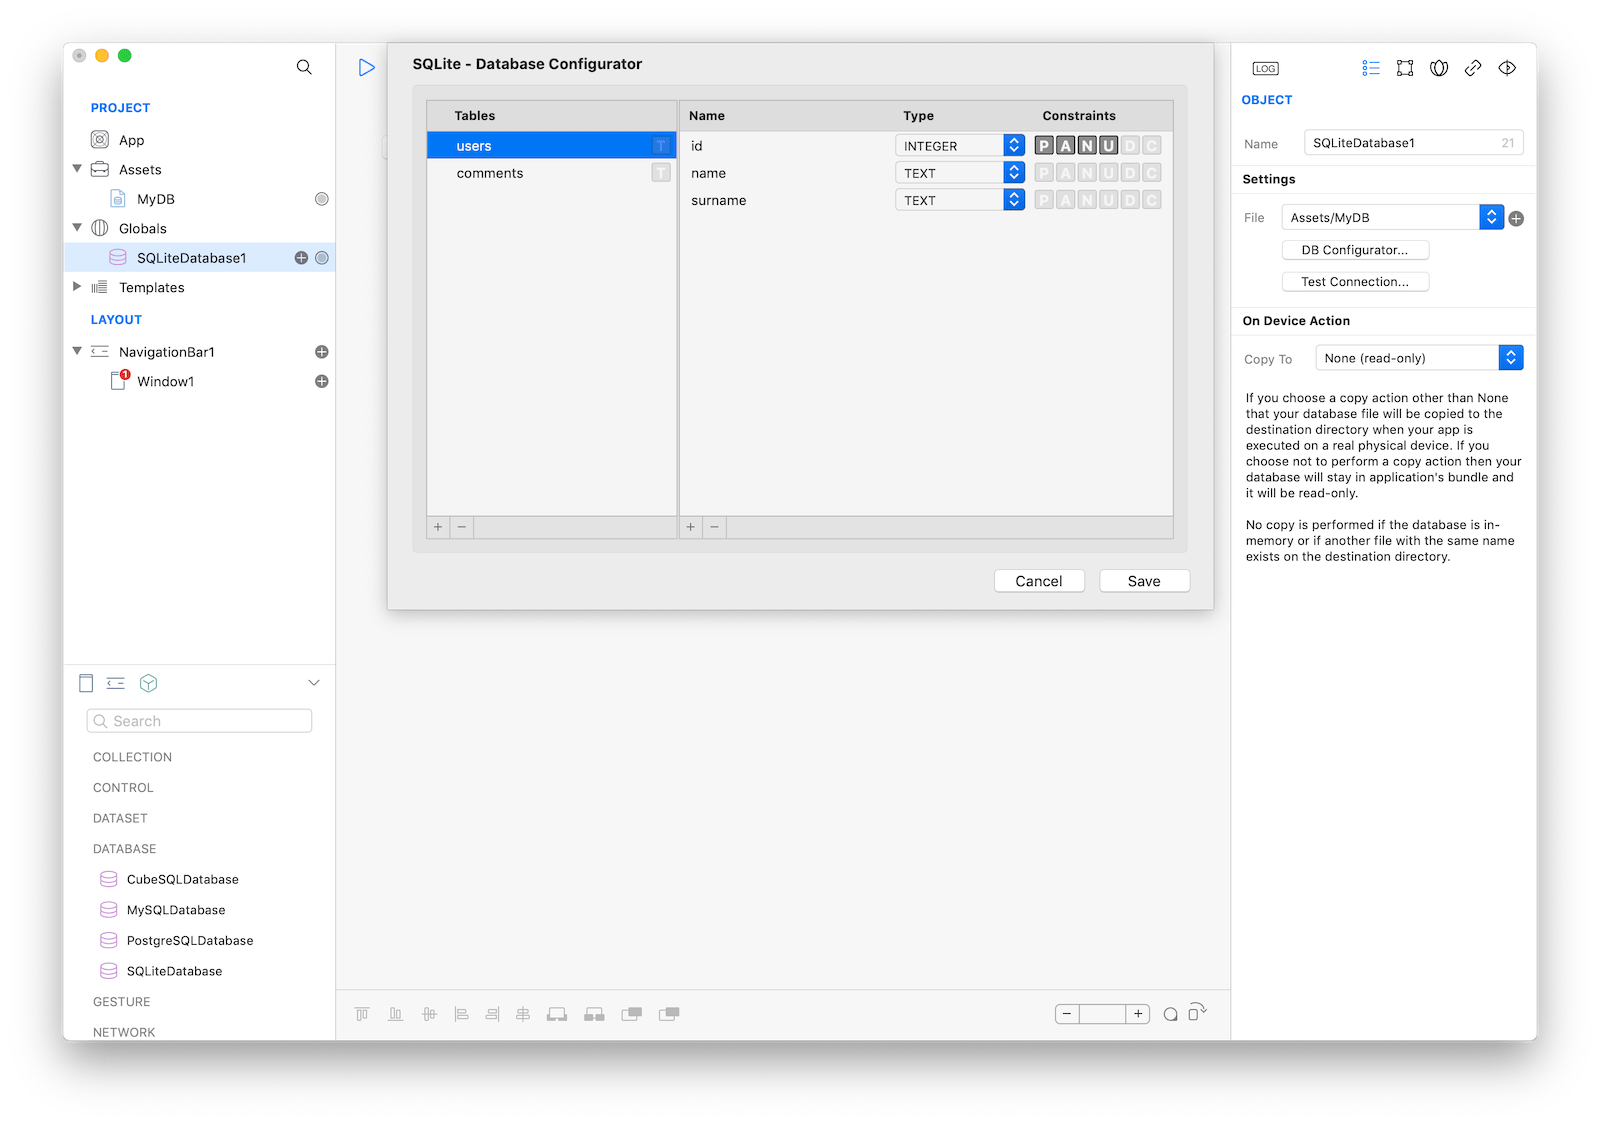
The tool is not limited to creating rows and tables but can also be used to setup constraints as well:
- by pressing the T button next to a table name.
- by pressing the constraints buttons next to a field name.
Note: a table primary key could be set using both ways but just one is needed. In case of misconfigurations a yellow Warning sign is shown at the top, click on it to read the problem's description.
Database queries and dataset
For all supported databases, Creo provides a tool to create and test static SQL queries. A query can also be created from code when they depend on user inputs or other parameters.
Using the UI a new SQL query is created by tapping the (+) button of a database.
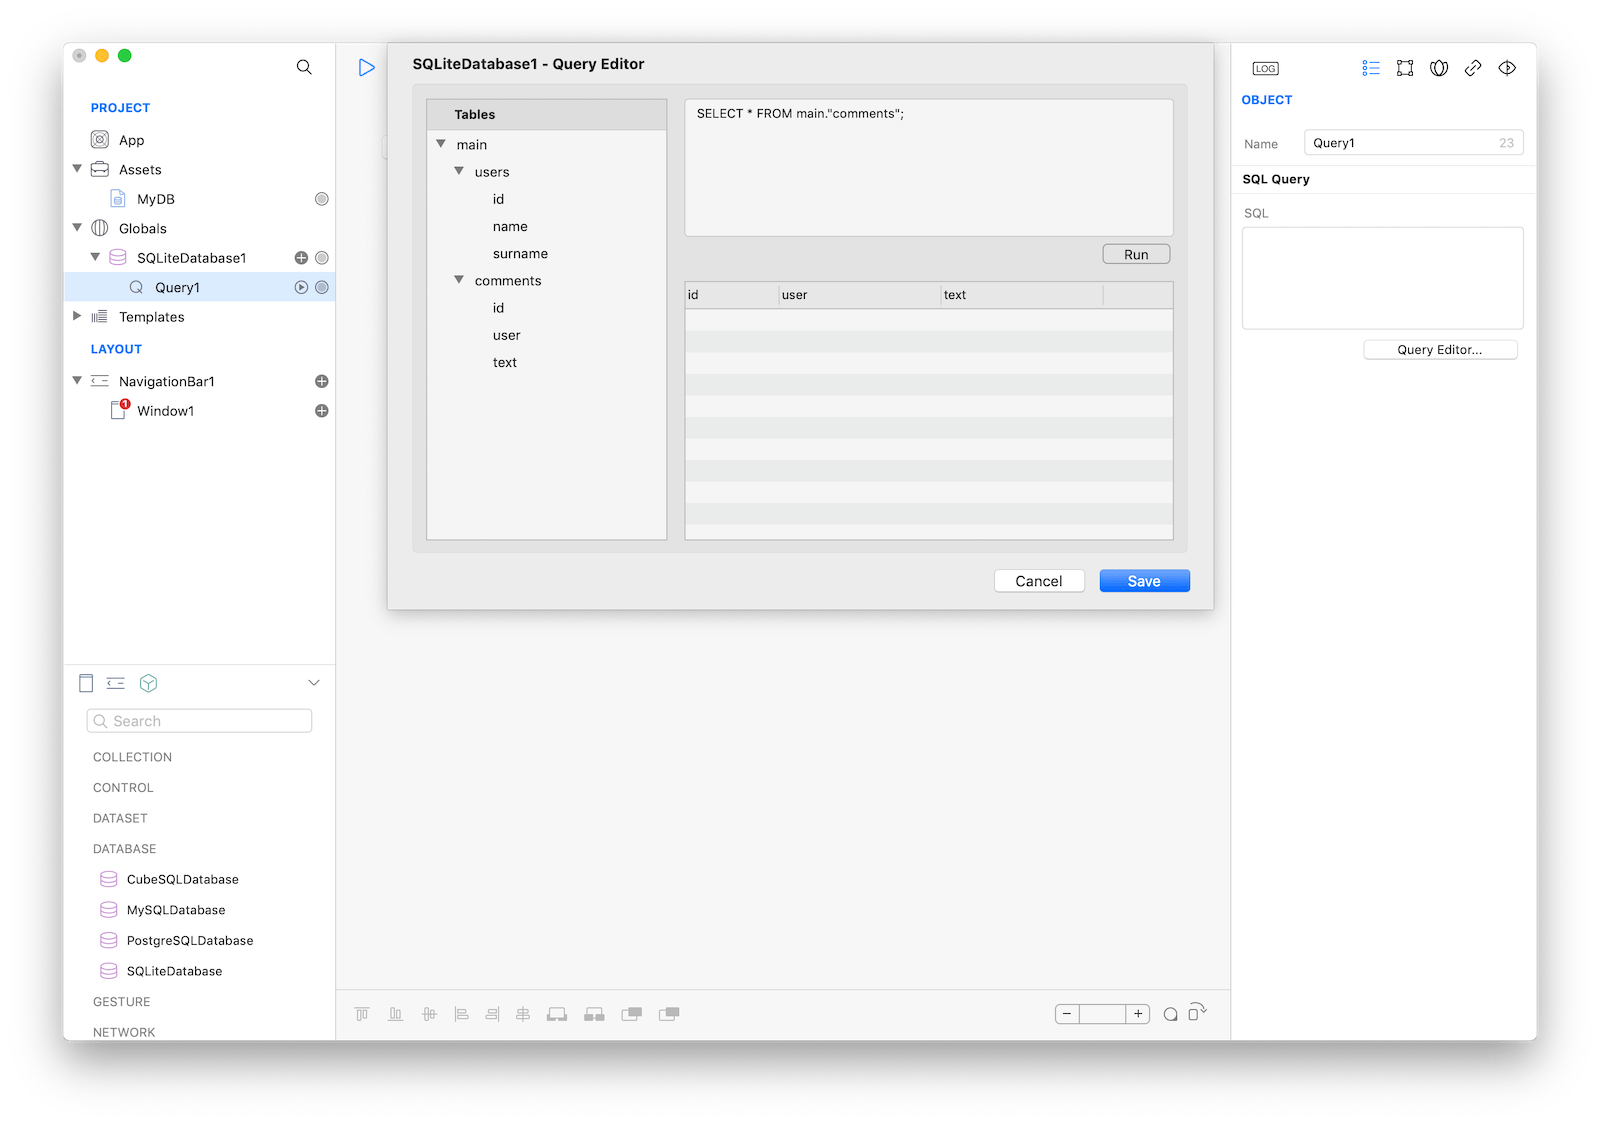
Note: to help writing correct queries the tool supports dragging fields from the left pane to the right pane.
In Creo any database query is also a Dataset and can be used as an input to populate any UI control that requires one.
For instance, controls like TableView, CollectionView and PageProvider all requires a Dataset.
Gravity code
Gravity can be used to interact with databases by code; you can call methods of a query object created by the UI or use the methods provided by the database object to write and execute plain sql.
Using Gravity with a UI generated query
Let's say you have a database named SQLiteDatabase1 and a query named users.
From Gravity SQLiteDatabase1.users is an object of type RecordSet
to run the query and wait for the result you have to bind the DidFinish event of the object and then all run:
var finish = {
Console.write("Did Finish fired")
while (SQLiteDatabase1.users.hasRow) {
Console.write("ID: \(SQLiteDatabase1.users.id)")
SQLiteDatabase1.users.moveNext()
}
}
SQLiteDatabase1.users.bind("DidFinish", finish)
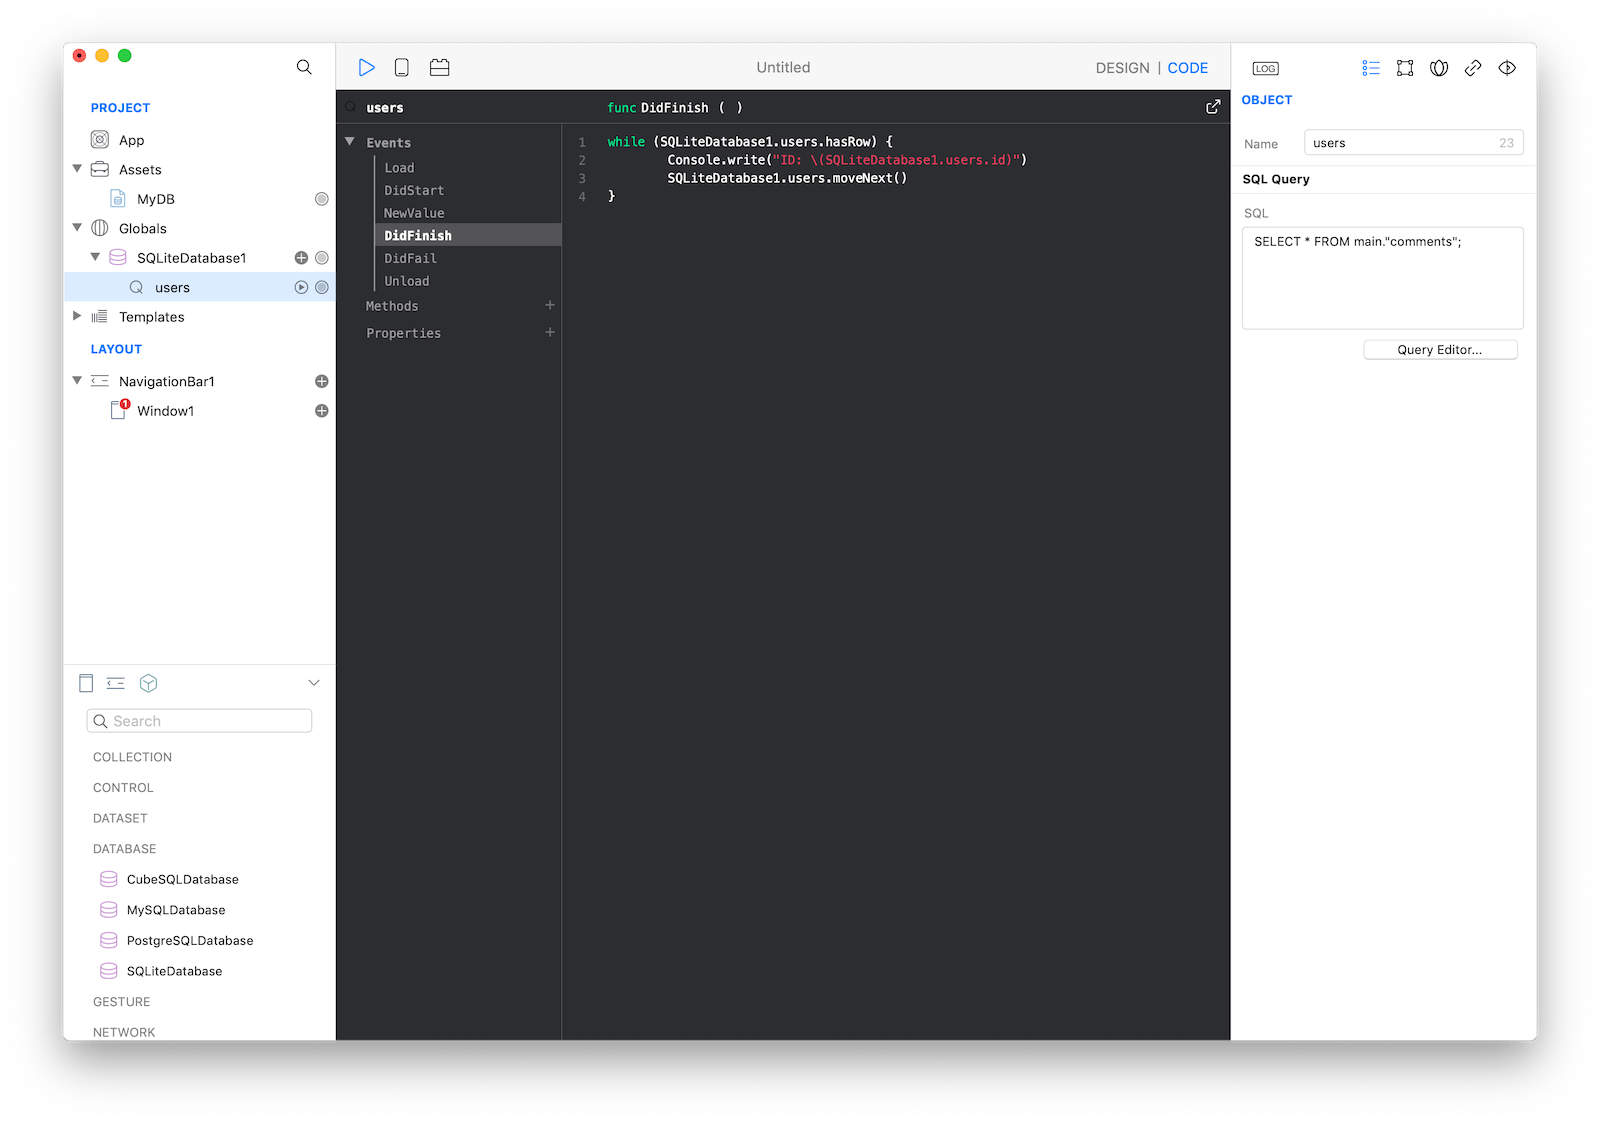
SQLiteDatabase1.users.run()Binding by code is not mandatory, you can also write the code directly in the code editor:
- Open the
Code Editor(cmd + 6) - Select the
DidFinishitem inside theEventsarea and write your custom code in theCode Editor
Note: anytime you call run on a query, all controls that use that as a dataset get refreshed.
Beware, run is an async call: sometimes you may be tempted to write:
SQLiteDatabase1.users.run()
while (SQLiteDatabase1.users.hasRow) {
        Console.write("ID: \(SQLiteDatabase1.users.id)")
        SQLiteDatabase1.users.moveNext()
}
unfortunately, this is an error and is not guaranteed to work; run is an asynchronous call and the while condition will most of the time return false if executed just after run. The proper way is to bind to the DidFinish event and execute any logic from there.
RecordSet
RecordSet has several methods and provides an easy way to change the plain sql code too:
SQLiteDatabase1.users.sql = "select * from users where name = 'nicola'"
SQLiteDatabase1.users.run()
it also offers a convenient way to access the row result by their column's name, ie in this case the table users has 3 columns, id, name and surname:
...
Console.write("ID: \(SQLiteDatabase1.users.id)")
Console.write("Name: \(SQLiteDatabase1.users.name)")
Console.write("Surname: \(SQLiteDatabase1.users.surname)")
...
where SQLiteDatabase1 is the dabatase, users is the query and id name surname are the column's name.
Using Gravity with custom sql
Let's say you have an SQLite database named SQLiteDatabase1 with a table named users.
For reference in Gravity the database object is of type SQLiteDatabase and we start by connecting to the database.
There are 2 ways to connect to a database:
- Synchronous, the connection waits until the attempt succeeds or fails
- Asynchronous, the function returns immediately and a callback is called to signal success or failure
Both ways use the method connect
Synchronous, no parameters
if (SQLiteDatabase1.connect() == true) {
    Console.write("Connected")
} else {
    Console.write("Error connecting")
}
Asynchronous, we also pass 2 params that are the functions called when the connection attempt complete.
var onSuccess = func(db) {
    Console.write("Connected")
}

var onError = func(db) {
    Console.write("Error: \(db.errorMessage)")
}

SQLite.connect(onSuccess, onError)
Once the connection is established, we can run a select with select or an update / insert with execute.
Both methods works like the connect, they accept one parameter with the plain sql and eventually two functions called when the execution ends.
Synchronous
var sql = "SELECT * FROM users"
var recordSet = SQLiteDatabase1.select(sql)
...
Asynchronous
var onSuccess = func(db, recordSet) {
    ...
}

var onError = func(db, recordSet) {
    Console.write("Error: \(db.errorMessage)")
}

var sql = "SELECT * FROM users"
SQLiteDatabase1.select(sql, onSuccess, onError)